Showing posts with label Tutorial. Show all posts

Saturday, September 8, 2012

Dip dye clown nails

Few days ago I did this dip dye nail design.


Now, this experiment might not have been the most successful one. My nails look like something straight out of a clown show. However, I am going to share with you a small tutorial on how to do this dip dye nail design. Because.... well, why not :D


I started off by painting my nails white with Ciaté snow virgin. This color has become one of my favorite whites. It is really pigmented and only two layers is usually enough.


In order to achieve that dipped slowly fading look you need a sponge. Brush some nail polish on the edge of the sponge. The color I used here was Nyx girls grape fruit which turned out to be entirely wrong color for this design and really hard to work with. It is not really pigmented so I had to put on several layers.


The next thing you have to do is start dabbing your nail with the sponge. Add several layers depending what kind of look you want to achieve. To get the fading effect dab only one or one really light layer on the part were you want your color to fade in. Alternatively, you can add a little bit of the polish on the tip of your nail and dab it with the sponge to fade it out.


I finished my look with Seche Vite top coat.


There you go. Simple, huh? If you're looking for more subtle effect contrast to this circus look, use two similar shades were the other one is for example more of a darker shade and the other one more lighter.

Hah, what do you think?

Wednesday, July 25, 2012

Love you Anastasia!

Few months ago I got the Anastasia Beverly Hills Beauty Express for Brows and Eyes.

The reason why I waited this long to try it out is because I had to grow my eyebrows... Not a pleasant project... But when I tried on the stencils that came in the set, I noticed that I had committed one of the worst make up sins... I had over plugged my eyebrows. So therefore, in order to get the full Anastasia experience I had to wait for a while and let two little bushes grow over my eyes. Definitely not the most pleasant weeks of my life.

Now I cannot stress enough how much I love this set. It is a lifesaver. It has made my make up routine so much easier.


The set itself is tiny and does not take much space in your purse. Which is great, cause this is a definitely a thing that I will always take with me when I am traveling.


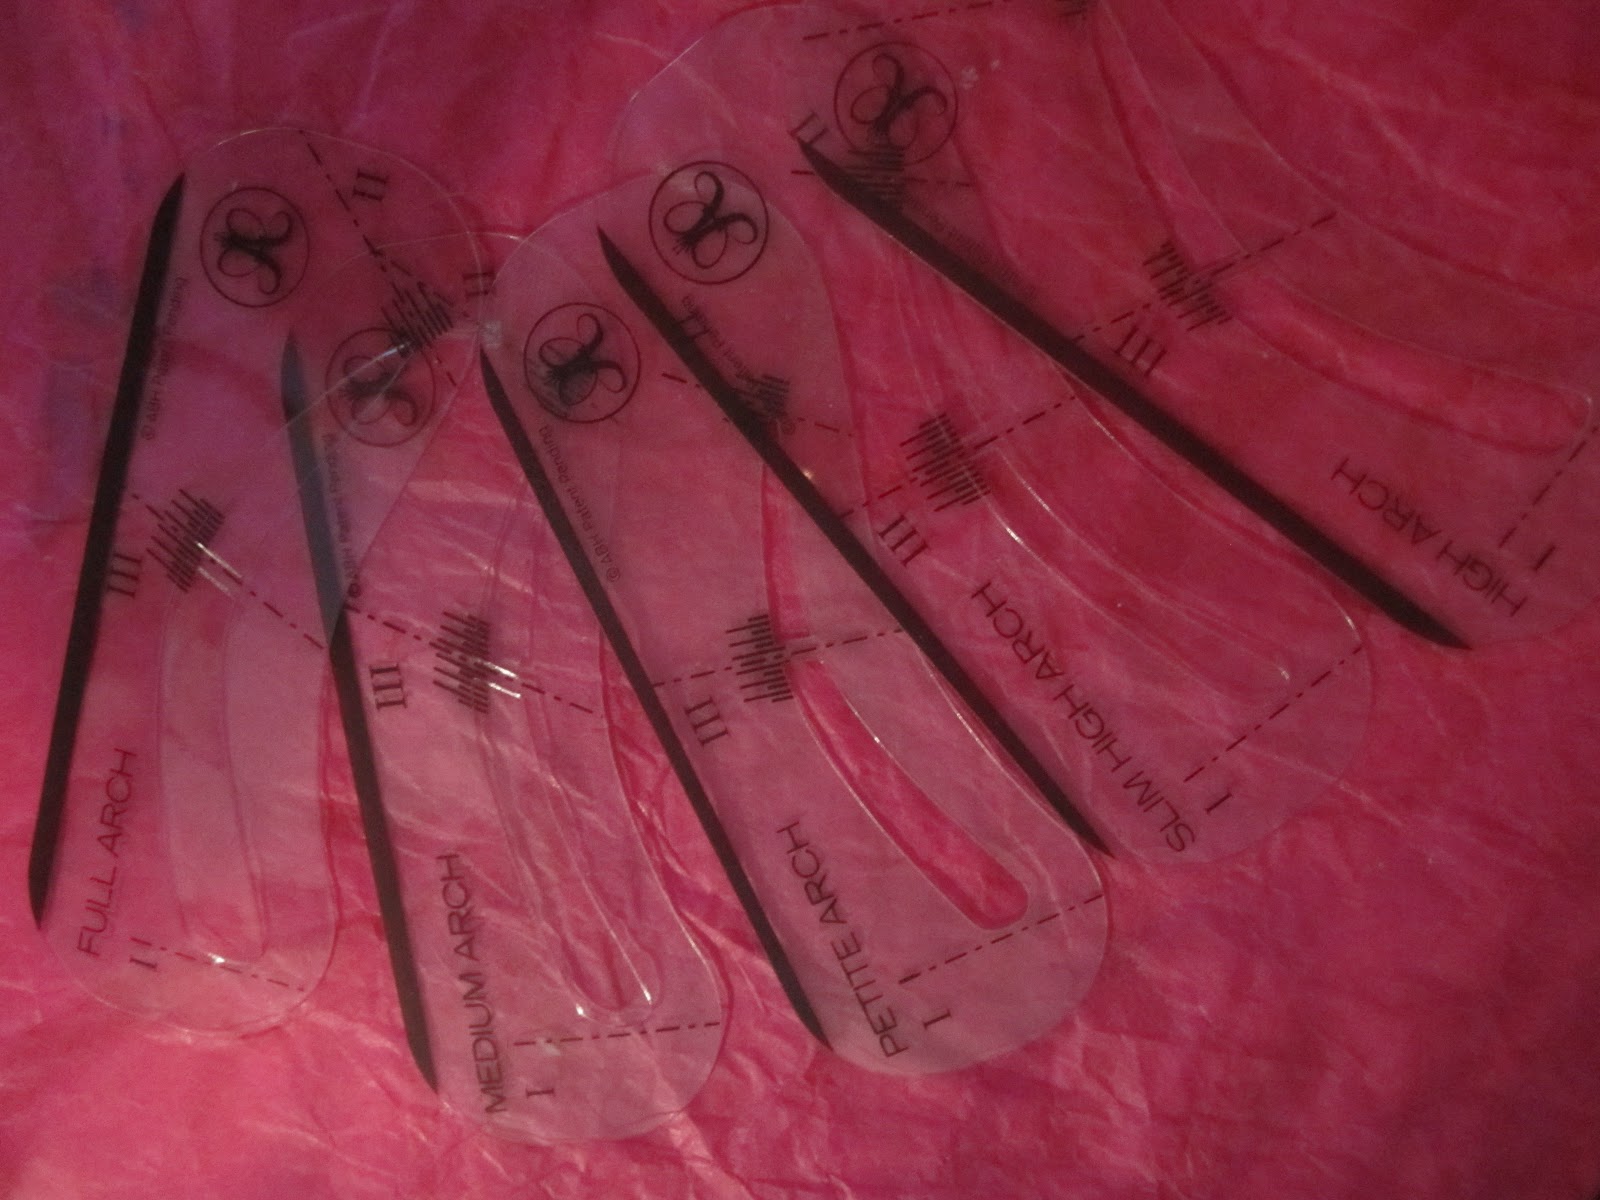
The set has a mirror, instructions, stencils, angled brush, brow wax cream, brow powder duo and an eyeshadow duo. Almost everything you need for your eye make up.


The set that I picked is meant for blondes so the shades are more light grayish.


The set is in my opinion a lifesaver for eyebrows. I do not understand how I have lived without it. The idea behind it is that with the stencils you can create a perfect shape for your eyebrows.


First you select the stencil of your liking. Preferably one that is closer to your current eyebrow shape. But the best part obviously is that you can spice up your appearance by changing the style. Then you apply the brow wax cream in oder for the brow powder to stick on better. Then you align the stencil on top of your eyebrow in accordance with the markings on the stencil and apply the brow powder to the open area. When you remove the stencil you can easily tweeze any excess hair outside of the powdered area. And there you go, you have perfectly shaped eyebrows.

The set comes with two great eyeshadows as well, which I quite prefer to use on my everyday make up.

I just love this set. At first I had some doubts about it. I found it impossible for a tiny set like this to suit all types of eyebrows. But I definitely was pleasantly surprised. The stencils are designed so that I believe everyone will find at least one for their liking. It has made it so much easier to shape my eyebrows and not over tweeze them. It can be really hard to get your eyebrows even and looking good but with this tool it is super easy. I would not give this up for anything. So thank you Anastasia you are truly the eyebrow queen :)

You can find more information about Anastasia Beverly Hills here.

Thursday, June 28, 2012

Easy Caviar Manicure

Few weeks ago I got the Ciaté Caviar Manicure set from Sephora.


I got the white version which is called the mother of pearls.


You can also get it in Rainbow and Black Pearls.


The set comes with one nail polish, small nail beads, a small funnel and a plastic case to collect all the beads in. It also comes with a full set of instructions so it is really easy to use.


Something that I really like about Ciaté is the super cute nail polish bottles. Those little bows are just so adorable.

Now here is the result of my Ciaté manicure.


And here is how I did it.

1. Prepare your nails


As a base coat I used Orly's Nail Defense and treated my cuticles with Nail Trek cuticle oil.


2. Apply two coats of the Ciaté nails polish


Now, the instructions only tell you to apply nail polish but to make the manicure last longer I added a top coat as well.


I used the Seche Vite Dry Fast Top Coat which I think is the best top coat around.

3. Quickly apply the beads before the nail polish dries off


This is where the plastic case comes into use. I mean it can be really messy when adding the beads. Those suckers just like to jump around.


Just place your finger over the plastic case, drizzle the beads on top of your nail and press them gently in. Do not press too much.


When you're done just simply put the nozzle on the nail polish bottle and pour all the fall out beads back to the bottle.


And there you go. Super easy and quick manicure.


Now, the manicure in itself does not last for very long (two or three days), especially if you did not use any top coat to really glue the beads on. But it is super cute, easy and quick manicure.

You can also do your own nail manicure set. Just use any nail polish that you have and mini beads from arts and crafts store. However, bare in mind that the beads are not meant to be used as nail decorations so they might have some toxicants in them which are not necessarily good for you.

What do you think? Have you tried the caviar manicure?

You can get the Ciaté Manicure set from here.


The manicure set pictures are from www.ciate.co.uk.


Wednesday, June 20, 2012

Inspiration: 25 Ways to Wear a Scarf

I just love Wendy's video on different scarf styles. No matter how many times I watch it, I seem to find something new every time :) Enjoy!


Which style is your favorite?


Check Wendy's YouTube channel for more video's.

Saturday, June 16, 2012

Nails for summer

I am a bit lazy when it comes to doing my nails. But sometimes I happen to get inspiration and I happen to have a camera with me.


The inspsiration and instruction for the design can be found here. Perfect for summer :)


Products that I used.